bilythekid
Par Member
Enjoy and contribute (positively) when possible!
In return for this discovery, I ask that all improvements to the technique be shared in the tutorial forum. I want all of us to know how to get every type of wave. I want clear waves with marbling, dark waves, large waves, small waves, multicolored waves (I've done this) different plastic techniques, different successful detergent types, etc. If we can take this thread as far as the marbling tutorial thread, then we have accomplished something.
I will plant the seed if you guys can help it grow and flower into something bigger...
I have recorded two 3 minute videos regarding the basics of this technique, I have also taken over 20 photos of the basics. Here is a Step by Step description, with images/ links and videos, inserted where relevant. I have also included a link to a photo album with more images of the process at the end.
Required to Dye:
DYE
I-dye poly or RIT in concentrated form (I'm using 1 packet of I-dye and between 16 and 20 fluid ounces of water) NO thickening agent (throws in trash...)
DETERGENT
Barbasol - is the only detergent used in this tutorial, It may be abbreviated as SC to for convenience.
Dish Soap - forms a different density and type of wave, I believe it is the detergent used for "true brainwave dyes"; this covers the old brainwaves and the new waves, which are clear and the disc is dyed around them. I have had trouble with the dye leaving the soapy waves and penetrating the plastics. I feel this is where we need the most experimentation, more on this later...
OTHER
Plastic or Glass plates - the surface on which to generate the waves. I like a plate with a convex lip that follows the top edge of the flight plate while the disc is inverted. For Mini's I've been using a cereal bowl with some good success. For larger discs, or more detailed work, I recommend an Ultimate Frisbee or pyrex baking dish. I use a beach frisbee in the videos.
Spare discs - Used to set up a dye plate and test the waters. Try to use as similar a disc as possible to the one you intend to dye.
Towels - This is a fairly dynamic process, you will be rising off discs and your dye plate frequently. I've found that excess water tends to add unwanted variability to the dye/detergent consistency.
Running Water - Running water is nice to keep things clean, you will be doing a lot of trial and error; sending colored shaving cream down the drain is no sweat and it can save a disc if you don't like the wave and can act quickly.
Convection oven or Toaster oven - After you get a wave that you are content with you will be quick curing the moisture out of the dye/detergent mix. This is not necessary, but I've found it is good for retaining high resolution in the shapes; it prevents the wet wave from having a chance to sag under the unrelenting forces or gravity.
Step 1: Practice and Familiarization
Take your Clean Plastic or Glass "wave plate", your barbasol, a towel and one of your spare discs and head over to the sink. Shoot a dollop of Barbasol on the center of the plate and set your spare disc on the barbasol face down. Now try to spread out that dollop of SC with radial motion and direct pressure to the back side of the flight plate.
Here is where the magic happens, gently peel the disc in a linear fashion (ie. left to right, right to left, from the top-left around clockwise to left, etc.). Turn the disc over and see your first wave.
Go rinse that SC and put the disc back into the bed, which contains a negative-wave. If some water finds its way into the mix, it will simulate the addition of dye, so its no big deal.
The hardest variable to manage is the thickness of Dye/Detergent on the bottom of the wave plate (in this practice it is just SC); too much gives fewer thick waves, too little give small patchy waving. This is where the trial and error and "learning" is involved. Spend time with shaving cream only to get a good idea of the thickness and amount of SC/Water (Dye/SC later) required for the results you seek.
Here is a video of practice waves with SC/water.
Step 2 Preparation and Dyeing
Now you will be mixing SC with dye. I use between 2 and 3 tablespoons of my concentrated I-dye for every ball-golf-ball-sized dollop of SC. Mix until even color is achieved, similar to what you would use for standard marbling; you can adjust by adding more SC or dye, accordingly. You'll want your mix to stand similar to whip cream from a can.
Once you've prepared your desired number of colors it is time to start dyeing. Take a dollop of two of your color and throw it in the wave plate, now grab the spare disc and start smoothing out the SC/dye mix, exactly as practiced above. Pull the spare disc from the plate and determine what action needs to be taken; Do you have too much in the wave plate/ not enough? If it looks good you can remove the excess around the edges of the pan and move on to the real thing, If not, keep rinsing/drying the spare or adding more dye, until you are content to proceed.
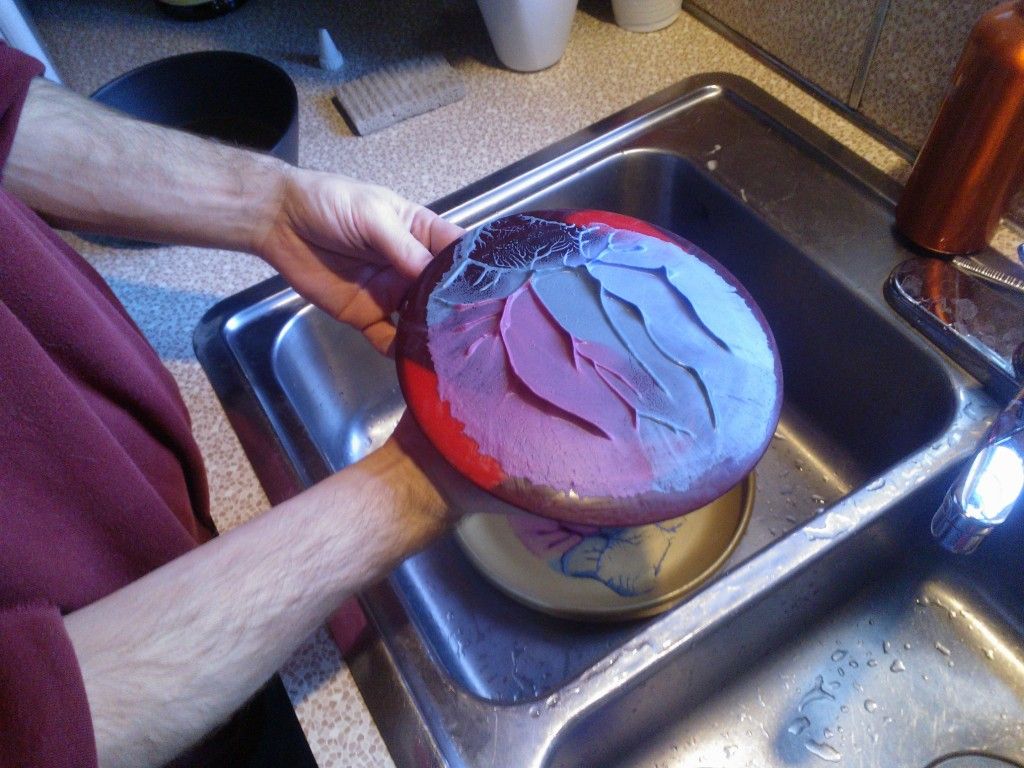
When placing the disc to be dyed in the mix, be aware that dyeing begins in the first 20-30 seconds, so dye accordingly. Push it down, swirl and peel, if not content return to the dye plate for a "second pull". If not content after 2nd pull, immediately rinse the disc and start over with a new bed mix and spare disc.
Here is a video of a multi-color application.
Step 3: Curing and Rinsing
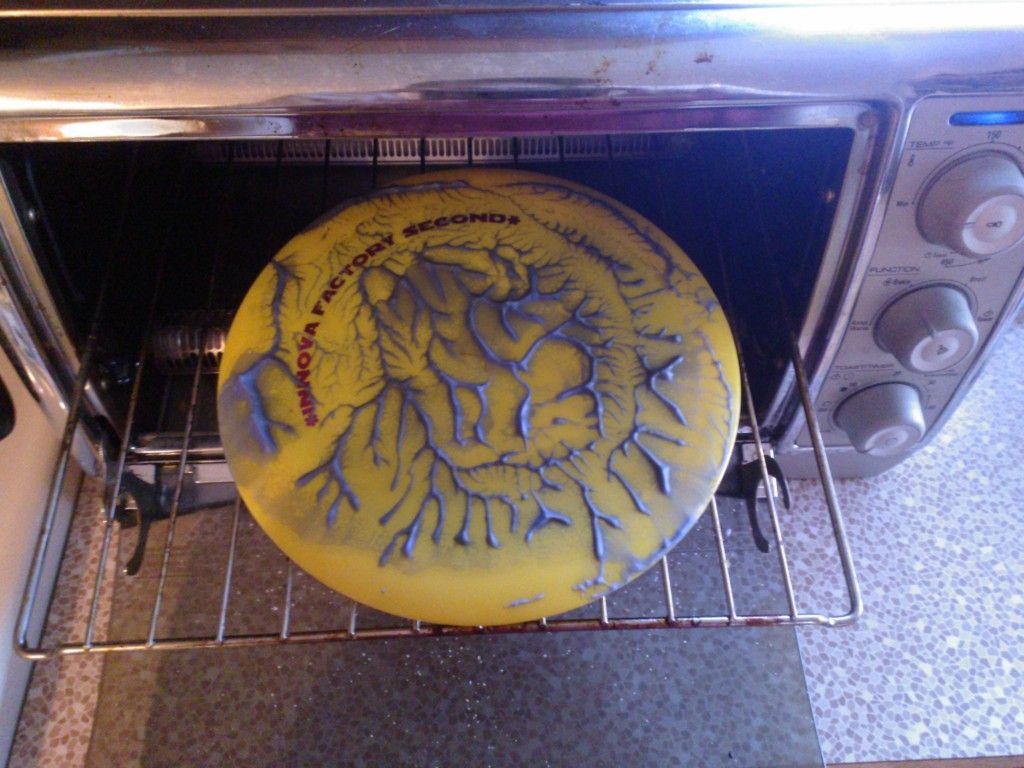
Take the disc you just peeled, being careful not to touch the art and place it in a convection or toaster oven on the lowest setting. I have not let a disc set longer than 40 minutes with the detergent/dye mix. Once the SC mix has clearly evaporated off all of it's water, the disc is basically done. All that remains is the rinse. Try not to touch the surface of the disc during the rinse, it can smear a new dye job on to top just that quick.
Step 4: Food for though; Moving forward
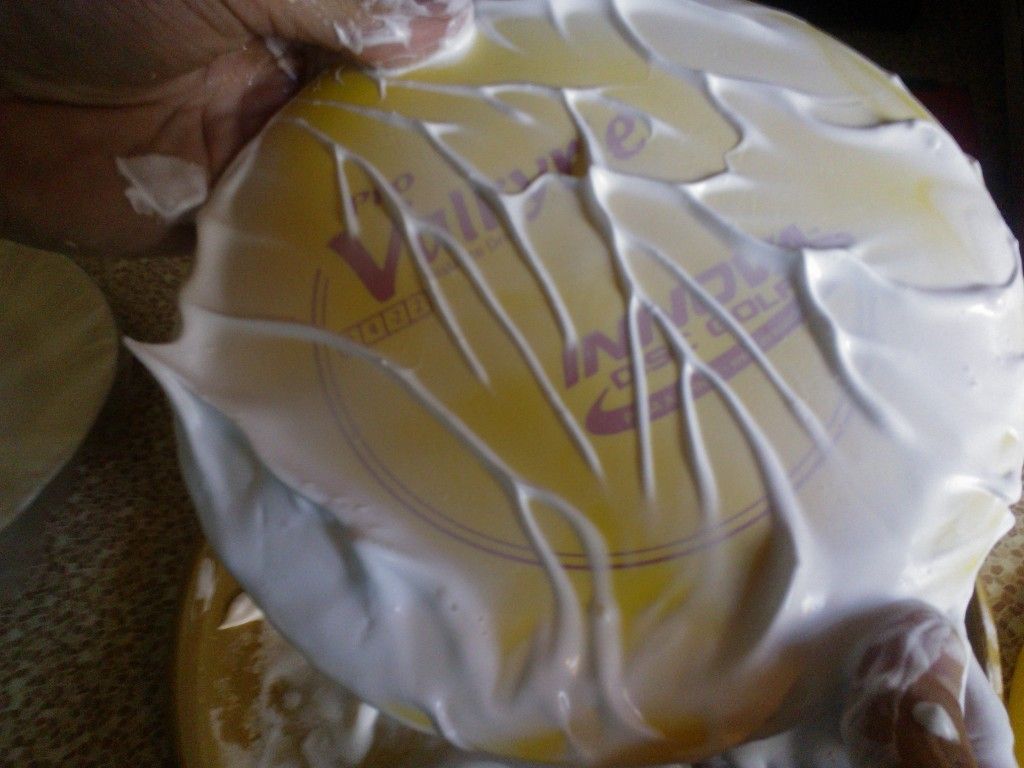
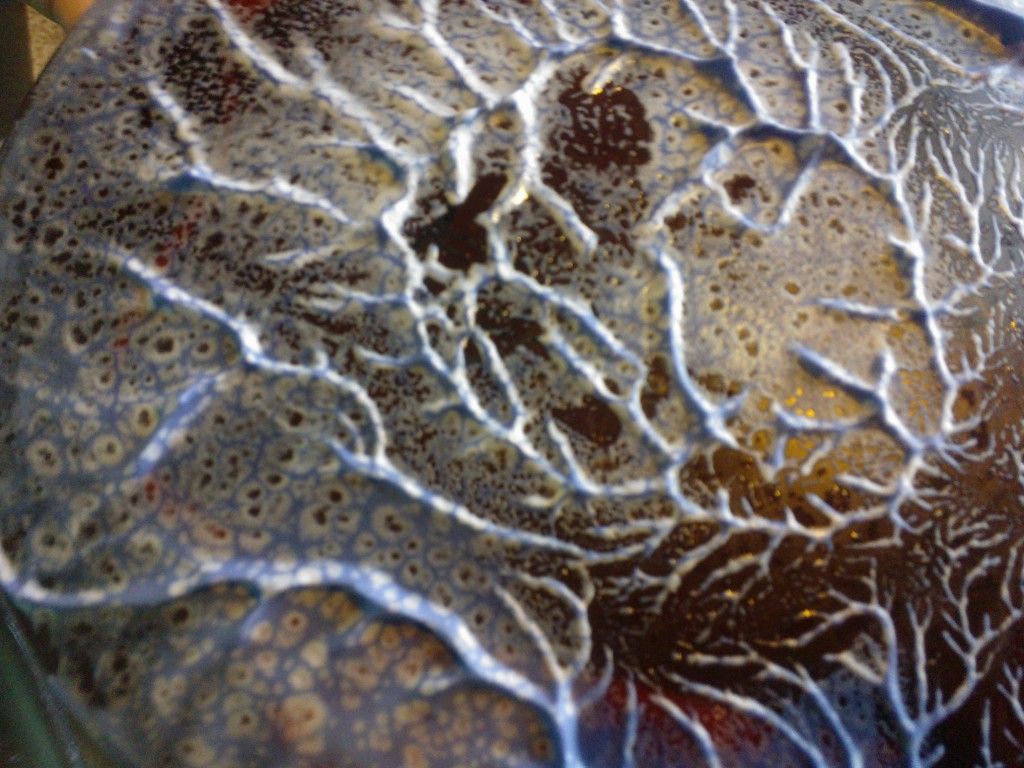
I have noticed that areas with very thick amounts of Dye/Detergent mix tend to NOT take dye. The photos in the album from today show some of these results. The yellow x-out star wraith has some nice before and after photos and has outlined waves in the center as a result. The yellow pro valkyrie that took dye VERY well, was "misted" with water from a spritzer bottle before the curing process; I have not tried that before today, but it appears to have filled in the insides of the waves rather well. Here is a photo of "misted" disc before curing.
Perhaps water misting helps to settle out the dye on the disc, but too much water will dilute your waves...
I think that the more recent discs produced by brainwave, those with "clear waves" and color marbled around them, are achieved by setting waves with ONLY dish soap. After the dish soap has dried it would be safe to put the disc into a marbling that would preserve "clear" waves, I think. This may also be possible with dried shaving cream. But honestly, It is too much of an undertaking for the two of us, that is where you guys come in :clap:
Finally, I would like to thank my good friend Michael who stuck with his desire to de-bunk the brainwave mystery, I had moved on to complex stencil cutting and multi-color marbling experiments. Michael's dedication is what led us to the day when we figured out "another way". Also, my sincerest thanks go out to THE JEFF ASH, the modern master of disc dyeing. Without Jeff's discovery, there never would have been a "brainwave" to emulate, I too, believe that impersonation is the truest form of flattery, Thanks again Jeff and best of luck.
Enjoy
Additional photos can be found here
http://s1083.photobucket.com/albums/j389/bilythekid_lvdc/Adhesion Cohesion Disc dyes/
In return for this discovery, I ask that all improvements to the technique be shared in the tutorial forum. I want all of us to know how to get every type of wave. I want clear waves with marbling, dark waves, large waves, small waves, multicolored waves (I've done this) different plastic techniques, different successful detergent types, etc. If we can take this thread as far as the marbling tutorial thread, then we have accomplished something.
I will plant the seed if you guys can help it grow and flower into something bigger...
I have recorded two 3 minute videos regarding the basics of this technique, I have also taken over 20 photos of the basics. Here is a Step by Step description, with images/ links and videos, inserted where relevant. I have also included a link to a photo album with more images of the process at the end.
Required to Dye:
DYE
I-dye poly or RIT in concentrated form (I'm using 1 packet of I-dye and between 16 and 20 fluid ounces of water) NO thickening agent (throws in trash...)
DETERGENT
Barbasol - is the only detergent used in this tutorial, It may be abbreviated as SC to for convenience.
Dish Soap - forms a different density and type of wave, I believe it is the detergent used for "true brainwave dyes"; this covers the old brainwaves and the new waves, which are clear and the disc is dyed around them. I have had trouble with the dye leaving the soapy waves and penetrating the plastics. I feel this is where we need the most experimentation, more on this later...
OTHER
Plastic or Glass plates - the surface on which to generate the waves. I like a plate with a convex lip that follows the top edge of the flight plate while the disc is inverted. For Mini's I've been using a cereal bowl with some good success. For larger discs, or more detailed work, I recommend an Ultimate Frisbee or pyrex baking dish. I use a beach frisbee in the videos.
Spare discs - Used to set up a dye plate and test the waters. Try to use as similar a disc as possible to the one you intend to dye.
Towels - This is a fairly dynamic process, you will be rising off discs and your dye plate frequently. I've found that excess water tends to add unwanted variability to the dye/detergent consistency.
Running Water - Running water is nice to keep things clean, you will be doing a lot of trial and error; sending colored shaving cream down the drain is no sweat and it can save a disc if you don't like the wave and can act quickly.
Convection oven or Toaster oven - After you get a wave that you are content with you will be quick curing the moisture out of the dye/detergent mix. This is not necessary, but I've found it is good for retaining high resolution in the shapes; it prevents the wet wave from having a chance to sag under the unrelenting forces or gravity.
Step 1: Practice and Familiarization
Take your Clean Plastic or Glass "wave plate", your barbasol, a towel and one of your spare discs and head over to the sink. Shoot a dollop of Barbasol on the center of the plate and set your spare disc on the barbasol face down. Now try to spread out that dollop of SC with radial motion and direct pressure to the back side of the flight plate.
Here is where the magic happens, gently peel the disc in a linear fashion (ie. left to right, right to left, from the top-left around clockwise to left, etc.). Turn the disc over and see your first wave.
Go rinse that SC and put the disc back into the bed, which contains a negative-wave. If some water finds its way into the mix, it will simulate the addition of dye, so its no big deal.
The hardest variable to manage is the thickness of Dye/Detergent on the bottom of the wave plate (in this practice it is just SC); too much gives fewer thick waves, too little give small patchy waving. This is where the trial and error and "learning" is involved. Spend time with shaving cream only to get a good idea of the thickness and amount of SC/Water (Dye/SC later) required for the results you seek.
Here is a video of practice waves with SC/water.
Step 2 Preparation and Dyeing
Now you will be mixing SC with dye. I use between 2 and 3 tablespoons of my concentrated I-dye for every ball-golf-ball-sized dollop of SC. Mix until even color is achieved, similar to what you would use for standard marbling; you can adjust by adding more SC or dye, accordingly. You'll want your mix to stand similar to whip cream from a can.
Once you've prepared your desired number of colors it is time to start dyeing. Take a dollop of two of your color and throw it in the wave plate, now grab the spare disc and start smoothing out the SC/dye mix, exactly as practiced above. Pull the spare disc from the plate and determine what action needs to be taken; Do you have too much in the wave plate/ not enough? If it looks good you can remove the excess around the edges of the pan and move on to the real thing, If not, keep rinsing/drying the spare or adding more dye, until you are content to proceed.
When placing the disc to be dyed in the mix, be aware that dyeing begins in the first 20-30 seconds, so dye accordingly. Push it down, swirl and peel, if not content return to the dye plate for a "second pull". If not content after 2nd pull, immediately rinse the disc and start over with a new bed mix and spare disc.
Here is a video of a multi-color application.
Step 3: Curing and Rinsing
Take the disc you just peeled, being careful not to touch the art and place it in a convection or toaster oven on the lowest setting. I have not let a disc set longer than 40 minutes with the detergent/dye mix. Once the SC mix has clearly evaporated off all of it's water, the disc is basically done. All that remains is the rinse. Try not to touch the surface of the disc during the rinse, it can smear a new dye job on to top just that quick.
Step 4: Food for though; Moving forward
I have noticed that areas with very thick amounts of Dye/Detergent mix tend to NOT take dye. The photos in the album from today show some of these results. The yellow x-out star wraith has some nice before and after photos and has outlined waves in the center as a result. The yellow pro valkyrie that took dye VERY well, was "misted" with water from a spritzer bottle before the curing process; I have not tried that before today, but it appears to have filled in the insides of the waves rather well. Here is a photo of "misted" disc before curing.
Perhaps water misting helps to settle out the dye on the disc, but too much water will dilute your waves...
I think that the more recent discs produced by brainwave, those with "clear waves" and color marbled around them, are achieved by setting waves with ONLY dish soap. After the dish soap has dried it would be safe to put the disc into a marbling that would preserve "clear" waves, I think. This may also be possible with dried shaving cream. But honestly, It is too much of an undertaking for the two of us, that is where you guys come in :clap:
Finally, I would like to thank my good friend Michael who stuck with his desire to de-bunk the brainwave mystery, I had moved on to complex stencil cutting and multi-color marbling experiments. Michael's dedication is what led us to the day when we figured out "another way". Also, my sincerest thanks go out to THE JEFF ASH, the modern master of disc dyeing. Without Jeff's discovery, there never would have been a "brainwave" to emulate, I too, believe that impersonation is the truest form of flattery, Thanks again Jeff and best of luck.
Enjoy
Additional photos can be found here
http://s1083.photobucket.com/albums/j389/bilythekid_lvdc/Adhesion Cohesion Disc dyes/
")