• Discover new ways to elevate your game with the updated DGCourseReview app!
    It's entirely free and enhanced with features shaped by user feedback to ensure your best experience on the course. (App Store or Google Play)

What am I doing wrong? Multi Color Dye.

Script

Eagle Member
Joined
Apr 17, 2006
Messages
831
Location
Charlotte
We all know the internet, full of people telling you what your doing wrong! This thread should take off!

I tried my first multi-color dye (2nd overall). I prepped my vinyl (oracel 631) and placed it on my disc. Every cut had already been done, so all I had to do was dip, remove, dip, remove another section etc.

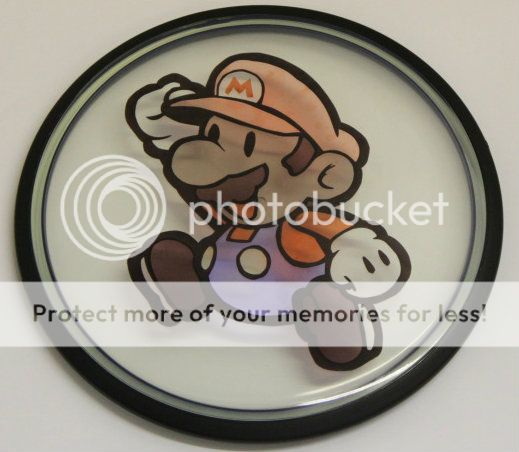
Well, the final result (which I'll post later) looks sweet (the colors came out awesome), but not only did I have bleeds on the edges (it's my 2nd dye, i'll get better at that), I had bleeds that seeped through the pre-cut portions of the vinyl. I dipped black first, then for the rest of the dye, anywhere I had a color to color transition, there was black, where I didn't intend.

Thoughts? Am I doing something in my process wrong? I can't play dg right now, so I gotta figure this dyeing thing out!
 
You may have had the dye too hot which can increase bleeds or you just didn't do a good enough job of working all the cut edges to prevent bleeds. I spend a lot of time going over all cut edges in order to prevent bleeds.
 
so, in turn, the process is legit (cutting the whole thing, and removing when need be). I can see the dye having been too hot, idye poly takes well and isn't needed as much. I can also see the blade not being sharp enough.

Thanks!

Dyeing is hard work. Massive props to those who create amazing stuff!
 
depending on how clean you made the cuts you may always get seepage through the lines.

my secret is rubber cement, cuetip with some rubber cement over the precut lines and it will mask all those lines from the dye. it doesn't ruin your dye and the weeding isn't any harder.
 
depending on how clean you made the cuts you may always get seepage through the lines.

my secret is rubber cement, cuetip with some rubber cement over the precut lines and it will mask all those lines from the dye. it doesn't ruin your dye and the weeding isn't any harder.

Never thought about trying that. Good tip.
 
depending on how clean you made the cuts you may always get seepage through the lines.

my secret is rubber cement, cuetip with some rubber cement over the precut lines and it will mask all those lines from the dye. it doesn't ruin your dye and the weeding isn't any harder.

now THAT is a brilliant tip!
 
I use elmers glue to do the same thing. However rubber cement might be even better. Thanks!
 
Any time you have an uncovered cut line in your vinyl when you do the black dip you are gonna get dyed lines (and a chance for bleeding). I also use elmers to cover precut lines, but if it's not too difficult of a design will just hand cut on the disc what's needed prior to the next dip.
 
I have used Elmers glue, but in longer dips it resolutes into the dye a little bit and i don't like it gunking up my dye. also if you dye long enough it tints the disc a little bit.

I have a few other uses and tricks i've found, but i'm considering displaying them this October. :)

glad i could help!
 
Any time you have an uncovered cut line in your vinyl when you do the black dip you are gonna get dyed lines (and a chance for bleeding). I also use elmers to cover precut lines, but if it's not too difficult of a design will just hand cut on the disc what's needed prior to the next dip.

Is this why you almost always see multicolors with black outlines around designs? Way easier than re-covering.

Does anybody have a good example of a complicated dye and the process they used? (When they re-covered, when they hand cut, etc.)
 
Not the most complicated for sure but it gives you an idea.

1. Cut black outline and dip black
2. Remove precut sections and dip brown
3. Remask, cut on disc and dip red
4. Cut on disc (no remask) and dip yellow
5. Remask, cut on disc and dip blue

This one was easy because of the thick black outline around everything which made the cuts for red, yellow, and blue easy to do.

IMG_7030-1.jpg
 
I really like that rubber cement trick. I guess I'll be stopping by the store on my way home tonight. I've tried Elmer's but was never able to get it to stay on the disc. Thanks velocity.
 
Not the most complicated for sure but it gives you an idea.

1. Cut black outline and dip black
2. Remove precut sections and dip brown
3. Remask, cut on disc and dip red
4. Cut on disc (no remask) and dip yellow
5. Remask, cut on disc and dip blue

This one was easy because of the thick black outline around everything which made the cuts for red, yellow, and blue easy to do.

IMG_7030-1.jpg

So yes, it's easier to do when there are thick lines. It's all making sense now!
 
Sorry for all the questions...

What's the advantage of having a plotter if you have to hand-cut a lot of multi-color dyes? What's are some tricks for lining up your hand cuts on a disc (say you want a seamless transition between colors in different color groups with little to no overlap?) Can you shine a light through almost any discs to see these points?
 
I can't help you out with those questions. I almost exclusively do multi color dyes that have nice black outlines and have as few remasks as possible.
 
I use an airbrush for seamless color blending. It is my key when dying a light saber blade. Someone, I forget who, made a gradient bucket, where a 5 gallon full of dye is slowly drained while the disc sits upright submerged in the bucket. The idea is that the bottom of the disc is exposed to the dye longer than the top of the disc creating a seamless transition. Both air brush and gradient bucket have tutorials somewhere in these forums.
 
What's are some tricks for lining up your hand cuts on a disc (say you want a seamless transition between colors in different color groups with little to no overlap?)

This might not be the answer you are looking for since I've only messed with Black dye before, but I use clear contact paper (found with cupboard lining in walmart). That might help you. Just put a sheet down over your original black dye, then hand cut on the disc the parts you want colored, and weed. Plus it's cheap material.
 
you may want to look at the vinyl you're using as well... oracal 631 is made to be an indoor vinyl and for temporary applications... i cut that stuff all the time for indoor wall decals, etc. the adhesive they use is not nearly as good as the 651 by design. i'd suggest trying to grab some different vinyl. if thats not the issue it'll certainly eliminate a variable.
 
Not the most complicated for sure but it gives you an idea.

1. Cut black outline and dip black
2. Remove precut sections and dip brown
3. Remask, cut on disc and dip red
4. Cut on disc (no remask) and dip yellow
5. Remask, cut on disc and dip blue

This one was easy because of the thick black outline around everything which made the cuts for red, yellow, and blue easy to do.

IMG_7030-1.jpg

This is awesome!
 
Not the most complicated for sure but it gives you an idea.

1. Cut black outline and dip black
2. Remove precut sections and dip brown
3. Remask, cut on disc and dip red
4. Cut on disc (no remask) and dip yellow
5. Remask, cut on disc and dip blue

This one was easy because of the thick black outline around everything which made the cuts for red, yellow, and blue easy to do.

IMG_7030-1.jpg

Mario rules, and so does that dye job. :clap:
 

Latest posts

Top