-
Discover new ways to elevate your game with the updated DGCourseReview app!
It's entirely free and enhanced with features shaped by user feedback to ensure your best experience on the course. (App Store or Google Play)
You are using an out of date browser. It may not display this or other websites correctly.
You should upgrade or use an alternative browser.
You should upgrade or use an alternative browser.
$30 AGame backpack bag at Academy Possible Magellan replacement?
- Thread starter jmgdiscgolf
- Start date
SonicGuy
Banned
- Joined
- Oct 7, 2014
- Messages
- 1,827
My point was that you do have to be aware of costs and what your profit needs to be.
Yes businesses also price based on market, so perhaps we are both right?
I'll take that olive branch and say we were talking at two ends of the same line.
MonkeyGrass
Birdie Member
What you guys are dancing around is what I clearly laid out in my last post - your price floor is always going to fixed at cost + x% - but your ceiling is whatever the market is willing to pay.
Perfect case in point - Proto Sheriff's. They cost the exact same amount to run as any other disc, yet retailers sold them for $39.99. More than DOUBLE the retail price of a stock lucid Sheriff. Same thing. They will never sell for LESS than $16-18 as that's the actual MSRP for the disc, however when the market dictates it, they can sell for up to $40-50 (retail) and $50-75 (aftermarket).
This isn't that difficult guys... lol
Then again I have to remind myself I'm on a Disc Golf forum...
Glide
Birdie Member
And yes - that's exactly what Innova has done with the HeroPack. They took a $30 Magellan, added about $5 worth of structural improvements, and then did some market analysis and saw that there were no decent bags below $100. So they set their MSRP at $79, knowing there was going to be 1) demand for an Innova branded backpack at that price and 2) their "cost" is merely a few dollars more than the Magellan, and this was going to be a money maker, and 3) they can discount that for TD's and sponsors, and still end up with a winner.
My first post on this topic several pages back was simply to point out difference between Academy selling the Magellan directly to consumers and Innova selling them primarily to retailers. There have been some comments about how Innova just increased the price of the same bag and called it something else. As you mentioned, there were some improvements that probably increased the cost of the bag. Like you said, maybe $5. Now they mark them up and sell them to retailers who also have to mark them up. The improvements and the wholesale component legitimately explain why the Magellan is $35 and the HeroPack is $80. I also agree with you that Innova is taking their position in the marketplace into consideration when pricing their products. Most companies with brand equity do.
Four choices for the HeroPack and four different choices for the Super HeroPack.
Did the email say anything about colors? Are you at liberty to divulge such details?
You said before that there are four each for the Hero and Super-
My guesses are Something red, blue, gray, and black.
Thanks.
Last edited:
Glide
Birdie Member
Did the email say anything about colors? Are you at liberty to divulge such details?
You said before that there are four each for the Hero and Super-
My guesses are Something red, blue, gray, and black.
Thanks.
Sure. I don't think the colors are being kept under lock and key. If you send me a pm with your email address, I'll forward the email to you.
... regarding the bag: could I put a divider from my innova shoulder bag in it if I wanted more dividers than just one in the middle? I.e., would it fit (divider approximately 9") and is the fabric on both sides such that Velcro would stick to it?
Thanks
Thanks
I can measure the divider in a bit, but the inside is definitely not hook/loop type fabric. It's smooth plastic. You'll have to sew some fabric strips if you want velcro to stick.
There's already 1 divider sewn in that splits the bottom of the bag into two sections. It's permanently sewn on the back side, and has velcro on the other side (with a corresponding strip of fabric sewn on the front side). And in case you decide you dont want to use the divider it just folds out of the way.
There's already 1 divider sewn in that splits the bottom of the bag into two sections. It's permanently sewn on the back side, and has velcro on the other side (with a corresponding strip of fabric sewn on the front side). And in case you decide you dont want to use the divider it just folds out of the way.
Last edited:
I can measure the divider in a bit, but the inside is definitely not hook/loop type fabric. It's smooth plastic. You'll have to sew some fabric strips if you want velcro to stick.
There's already 1 divider sewn in that splits the bottom of the bag into two sections. It's permanently sewn on the back side, and has velcro on the other side (with a corresponding strip of fabric sewn on the front side). And in case you decide you dont want to use the divider it just folds out of the way.
Ok, thank you - that's what I was wondering... I guess my concern is that if I'm only carrying say 12-16 discs for example is it going to be annoying if a few are falling over (because not held up by any dividers other than middle) ... but I like idea of occasionally carrying backpack with extra space for jacket/sweatshirt, extra water/snacks, etc. on longer courses...
pjhayes7
Double Eagle Member
Ok, thank you - that's what I was wondering... I guess my concern is that if I'm only carrying say 12-16 discs for example is it going to be annoying if a few are falling over (because not held up by any dividers other than middle) ... but I like idea of occasionally carrying backpack with extra space for jacket/sweatshirt, extra water/snacks, etc. on longer courses...
Just throw a couple of towels in there as well. I often do this anyway just to carry my towels. Rolled up they take up space and put enough pressure on the disc so they don't fall over, but will not warp them.
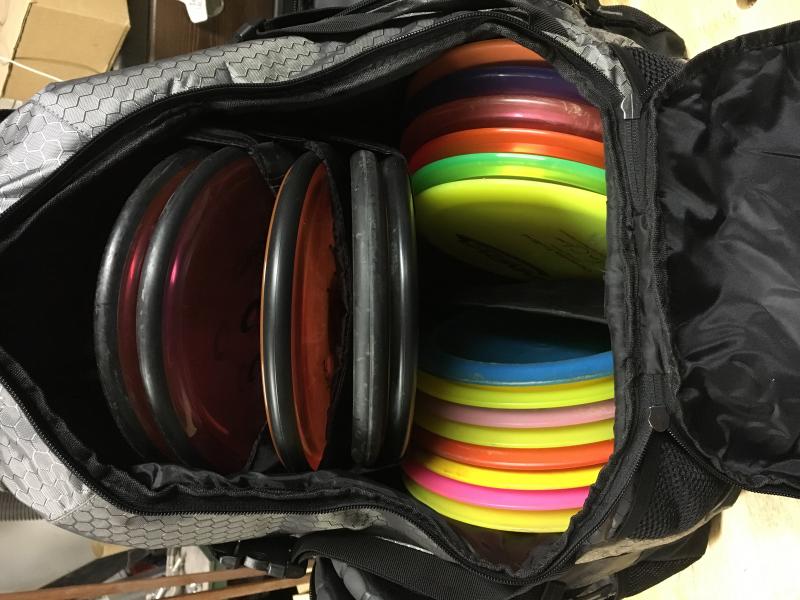
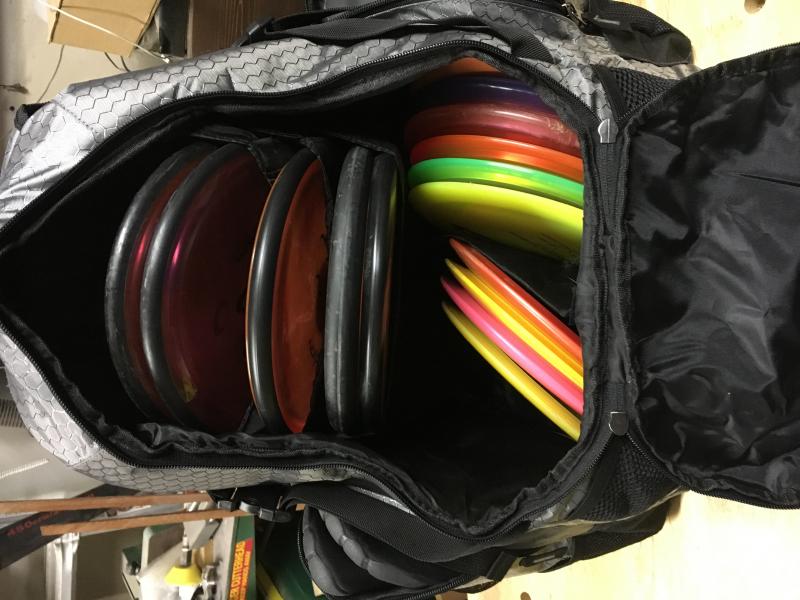
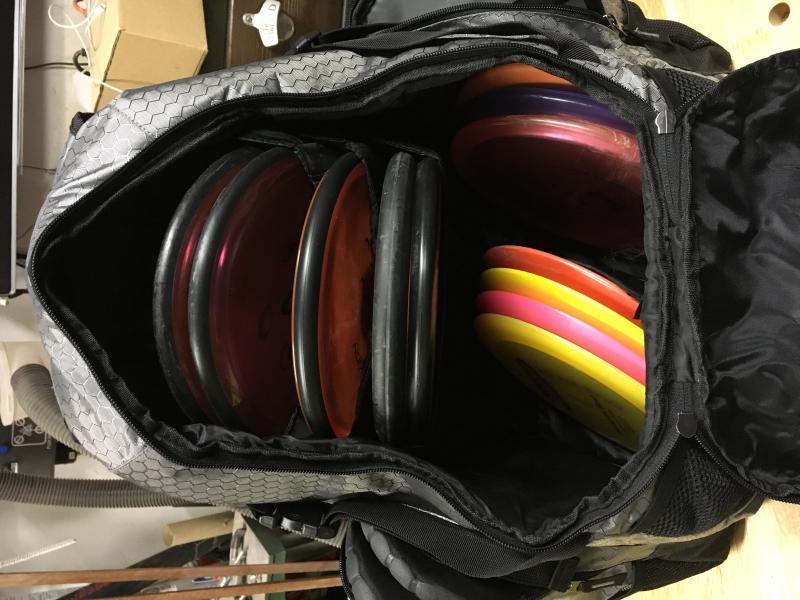
Took a few photos of a half'ish full bag to give you an idea of how discs may lay.
Full disclosure, I put 3-4 coats of plastidip on the bottom of the bag, so it gives it a bit more structure and sits flatter. I read about people putting cutting boards, etc. in the bottom to help it stay flat but I think the plastidip does just fine.
My opinion, it really doesnt matter if the bag is full or only half full, etc. It rides on your bag the same, and doesnt feel any different.
The plastidip after around 6 rounds. From doing this to other packs, I can attest that this stuff is AWESOME and will last you years.

As for the spacer, here's a measurement of the spacer that is already in there. Should give you an idea if the spacer you already have may fit in there (if you decide you want to sew/glue a strip of hook/loop fabric in there for your spacer to stick to.
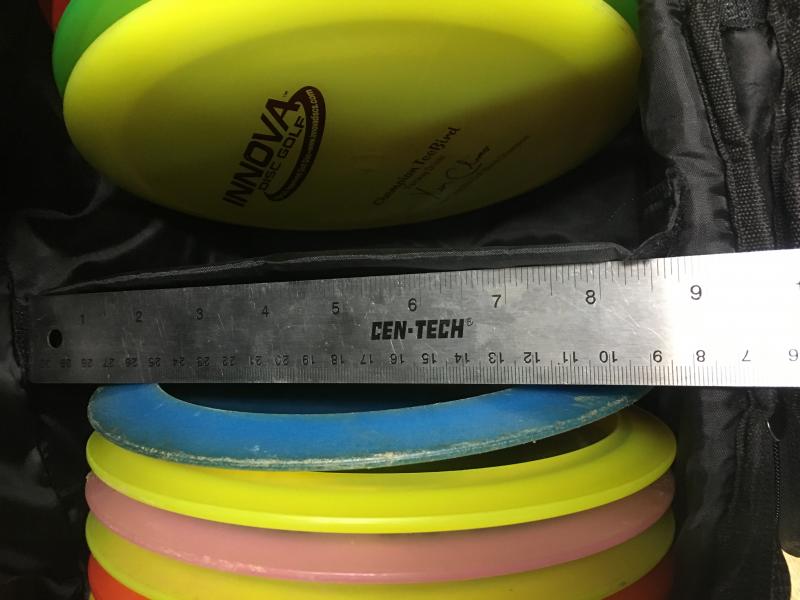
Hope this helps! Let me know if you guys need any other particular measurements.
Full disclosure, I put 3-4 coats of plastidip on the bottom of the bag, so it gives it a bit more structure and sits flatter. I read about people putting cutting boards, etc. in the bottom to help it stay flat but I think the plastidip does just fine.
My opinion, it really doesnt matter if the bag is full or only half full, etc. It rides on your bag the same, and doesnt feel any different.
The plastidip after around 6 rounds. From doing this to other packs, I can attest that this stuff is AWESOME and will last you years.
As for the spacer, here's a measurement of the spacer that is already in there. Should give you an idea if the spacer you already have may fit in there (if you decide you want to sew/glue a strip of hook/loop fabric in there for your spacer to stick to.
Hope this helps! Let me know if you guys need any other particular measurements.
If you've not looked into it or done it, here's how to do the plastidip.
Stuff your bag full of towels or t-shirts, etc. to get it to fully expand and sit correctly. Tape off where you want the plastidip line to end. (like masking lines when painting the walls/baseboards in your home). Use the brush-on kind of plastidip (not the spray, as it's not as thick and more likely to flake off). Brush on a very thin coat, working the plastidip into the material, and the seams as good as you can. Let that dry, then brush on a thicker coat. Let dry for an hour, then brush on another thick coat. Repeat as you wish. I usually do 3-4 coats. For reference, I used about 3/4 of a bottle of plastidip on mine.
After you've applied the last coat of plastidip and waited a few minutes, peel off the tape so it doesnt get stuck once everything's dry.
Let the bag dry for at least 12 hours or so, and it should be good to go.
You'll probably need a new brush for each coat applied. This stuff is tough to wash out of a brush. I use the cheap $.99 chip brushes from Lowes.
If you've not looked into it or done it, here's how to do the plastidip.
Stuff your bag full of towels or t-shirts, etc. to get it to fully expand and sit correctly. Tape off where you want the plastidip line to end. (like masking lines when painting the walls/baseboards in your home). Use the brush-on kind of plastidip (not the spray, as it's not as thick and more likely to flake off). Brush on a very thin coat, working the plastidip into the material, and the seams as good as you can. Let that dry, then brush on a thicker coat. Let dry for an hour, then brush on another thick coat. Repeat as you wish. I usually do 3-4 coats. For reference, I used about 3/4 of a bottle of plastidip on mine.
After you've applied the last coat of plastidip and waited a few minutes, peel off the tape so it doesnt get stuck once everything's dry.
Let the bag dry for at least 12 hours or so, and it should be good to go.
You'll probably need a new brush for each coat applied. This stuff is tough to wash out of a brush. I use the cheap $.99 chip brushes from Lowes.
Thank you for the plastidip breakdown! Where is best place to buy the brush on kind of plastidip? Do you use the cheap foam/sponge type brushes (I use those for various things as throw aways and assume that would work...)
Bought one of these bags as an inexpensive tryout of a backpack bag. Pretty happy with it after a couple rounds. It stood up on all kinds of slopes, is comfortable to carry, and has plenty of space for stuff. I had 21 discs in it and could easily fit a couple more in the bottom, as well as 3 more in the vertical storage areas. With 18 discs in the bottom storage area, there was no sagging/bowing on the bag's bottom between the plastic rails. Will be interesting to see how long it holds up. For $30 it seems to be a fantastic deal. I do intend to buy one of the Upper Park Rebel bags for a main bag, and use this as a fieldwork/trunk of the car bag.
If you've not looked into it or done it, here's how to do the plastidip.
Stuff your bag full of towels or t-shirts, etc. to get it to fully expand and sit correctly. Tape off where you want the plastidip line to end. (like masking lines when painting the walls/baseboards in your home). Use the brush-on kind of plastidip (not the spray, as it's not as thick and more likely to flake off). Brush on a very thin coat, working the plastidip into the material, and the seams as good as you can. Let that dry, then brush on a thicker coat. Let dry for an hour, then brush on another thick coat. Repeat as you wish. I usually do 3-4 coats. For reference, I used about 3/4 of a bottle of plastidip on mine.
After you've applied the last coat of plastidip and waited a few minutes, peel off the tape so it doesnt get stuck once everything's dry.
Let the bag dry for at least 12 hours or so, and it should be good to go.
You'll probably need a new brush for each coat applied. This stuff is tough to wash out of a brush. I use the cheap $.99 chip brushes from Lowes.
Plasti-dipPED! Think it turned out well. I appreciated the instructions laid out for me!
Attachments

pjhayes7
Double Eagle Member
Plasti-dipPED! Think it turned out well. I appreciated the instructions laid out for me!
This looks like you did an incredibly good job. I should get you to do that to my Magellan.
F. Howl
* Ace Member *
Plasti-dipPED! Think it turned out well. I appreciated the instructions laid out for me!
That's such a nice even coat, with no apparent brush strokes. I'm considering picking up a spray can, instead of brushing it on because I've seen some messy plastidip jobs.
Similar threads
- Replies
- 3
- Views
- 151
- Replies
- 0
- Views
- 1K
- Replies
- 14
- Views
- 5K
- Replies
- 14
- Views
- 11K