• Discover new ways to elevate your game with the updated DGCourseReview app!
    It's entirely free and enhanced with features shaped by user feedback to ensure your best experience on the course. (App Store or Google Play)

Shaving cream design and Results

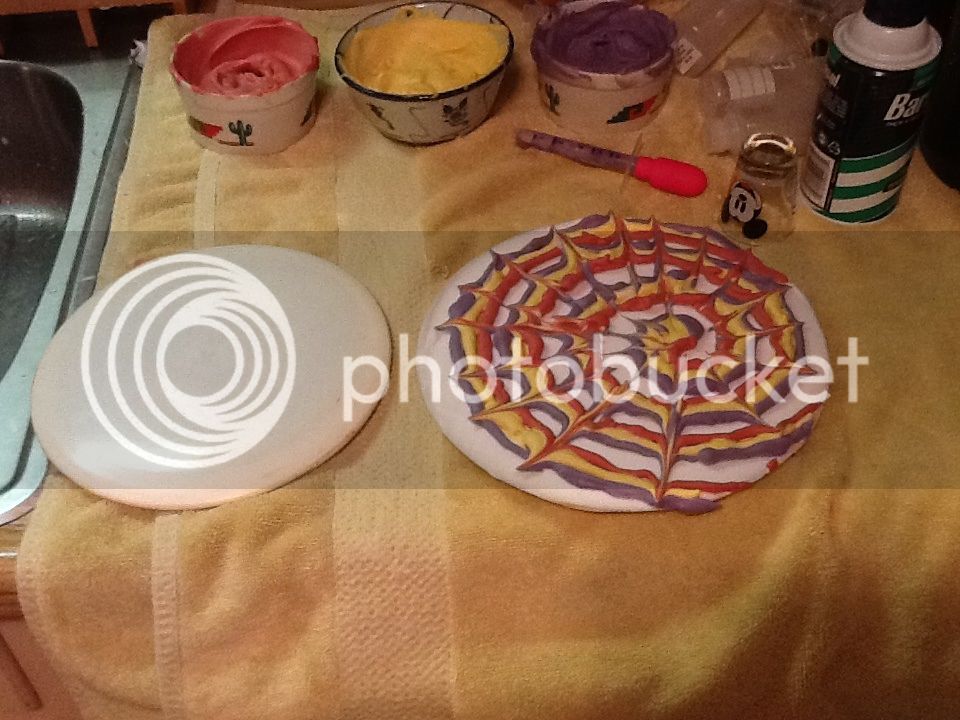
If you click the link before the two pictures, you can see the process I went through.

UncleChicken, did you end up pulling the color all the way into the middle or did it just run there during the dye process? And I'm assuming the underside got dyed by the overflow?

Cool twist BTW. Looks good.
 
The process makes sense. I don't think that the colors are to light at all. It's a very relaxing kind of tie dye.
 
Start of something new... it's a beat up Sidewinder.
Once again I made the SC bath too watery. Ugh. I still think it'll turn out pretty well. Guess will see tomorrow! I hate the wait!
 
Twelve hours later the dye is pretty weak. Did I need to go longer? Or does Champion plastic not work so well for the SC dyes? The rim looks rad though.
 
^both. Champ never comes out as vibrant as opaque plastic. It does help to make your dye super concentrated and let it sit for 24 hours if you can. (may end up with some unintended 'slip' as it sits that long)
 
My second ever dye. It came out a lot better than my first. I saw the disc Unclechicken posted where he spooned the excess dyed cream which gushes from the sides of the plate on to the back of the disc, just genius. I was trying to find a way to dye the underside of a disc along with the front, so I used that technique here and I like it.
 

Attachments

  • DSCN2414.jpg
    DSCN2414.jpg
    37.2 KB · Views: 153
  • DSCN2415.jpg
    DSCN2415.jpg
    37.4 KB · Views: 101
This is how it turned out. Added Mr Walter White to it today as I'm getting my stoke on for Sunday!
 
My third dye, I used a thicker shaving cream base and it helped both the colors and the pattern really pop.
 

Attachments

  • DSCN2407.jpg
    DSCN2407.jpg
    68.5 KB · Views: 137
  • DSCN2422.jpg
    DSCN2422.jpg
    147.2 KB · Views: 180
  • DSCN2423.jpg
    DSCN2423.jpg
    148.7 KB · Views: 130
Very nice......what's your process for doing the bottom?

A lot of times there is extra shaving cream with dye that oozes out the side (or out of the plate) as the pattern is bigger than the disc. just scoop up some of that extra dye with a spoon and gently plop it on top. try not to shake/disturb the disc sitting in the bed of course. I've done a few different dyes on the underside of some star stuff just by adding new shaving cream dye in snail trail patterns all across the underside.
 
tried a spiral last night.....my guess is that my pattern on the shaving cream bed was to crowded because it didn't turn out real well. I dyed the back by scooping the extra that oozed out on to the back and it turned out great. It's like my grandson tells me "keep on trying grandpa, don't give up.
Before -
image-3.jpg
I

During-
http://i1117.photobucket.com/albums/k582/dj_judy/image-2.jpg

Top after-
http://i1117.photobucket.com/albums/k582/dj_judy/image-5.jpg

Bottom after-
http://i1117.photobucket.com/albums/k582/dj_judy/image-4.jpg
 
you will also get a less blurred facts and a more solid a fact if you use a deep dish cake pan to hold the shaving cream bed in. your shaving cream bed looks more open so the shaving cream will expand out the sides easier. is this movement of the shaving cream overtime that creates the blur effect. If the bed is too watery obviously it expands easier, and if the sides are un contained that also contributes.
 
My first attempt. The blue ended up being a little too far out. But it took the other colors quite well. I want to get a much lighter colored disc and try again. I have another orange one that I might try tonight as another tester.
 

Attachments

  • IMG_1381.jpg
    IMG_1381.jpg
    142 KB · Views: 76
  • IMG_1382.jpg
    IMG_1382.jpg
    147.5 KB · Views: 105
My latest attempt. Used a little acetone. Turned the red stamp silver. Thought it looked pretty sic.
 

Latest posts

Top