• Discover new ways to elevate your game with the updated DGCourseReview app!
    It's entirely free and enhanced with features shaped by user feedback to ensure your best experience on the course. (App Store or Google Play)

New DIY $25 Backpack Bag.

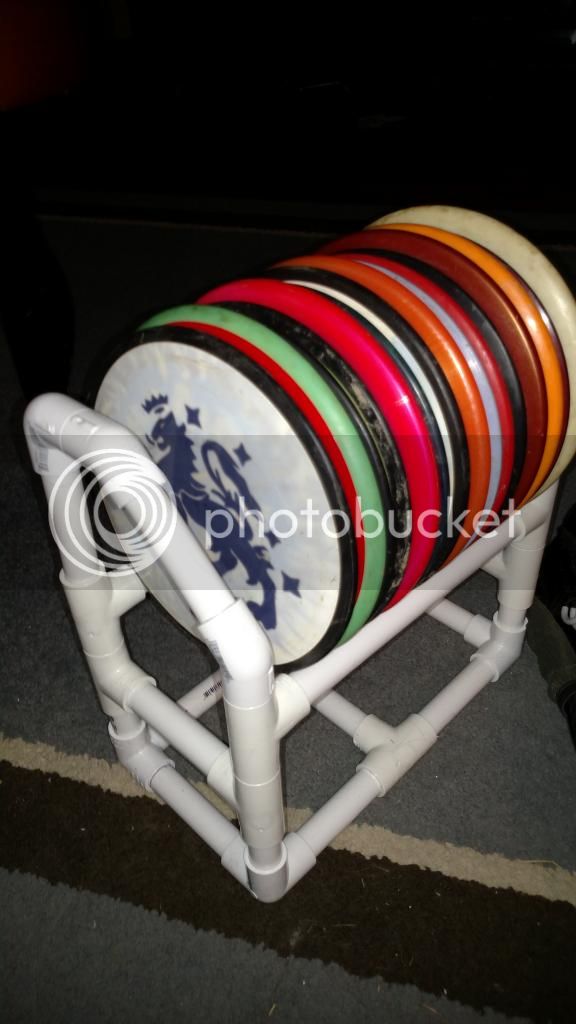
OK, so here is the first modification I've made, and how to construct my version of the frame. You will need 10' of 1/2" PVC, cut up as follows:

5x 4 1/2" pieces to build front to back cross members
4x 4 1/4" pieces to build the horizontal base
4x 2 1/2" pieces for vertical risers to second set of front to back supports
2x 9 3/4" pieces for horizontal cross members/disc supports
4x 4 1/8" pieces for rear vertical supports and diagonal pieces.
8x 1 1/4" pieces to join PVC elbows directly together

10 1/2" PVC Tees
4 1/2" Side discharge elbows
2 1/2" 90 degree elbows
4 1/2" 45 degree elbows

After cutting the pipe in half to get it home, and making a few errors, I was left with less than a foot of pipe left over, so make sure you buy the whole 10' section (Lowes had 5' sections, and I almost bought one of those until I noticed that 10' was only 42 cents more).

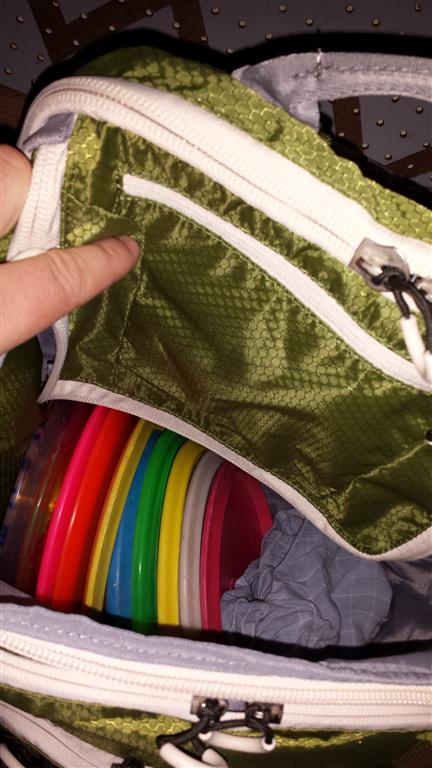
After building the frame outside the bag I discovered that it would not fit into the bag, so if you follow my plan you'll need to build the base and the first set of risers and add them the bag, then add the second set of supports from front to back with a set of 1 1/4" supports. Then add the cross pieces with the disc supports. Finally add the last vertical pieces with the 45 degree elbows.

IMG_20150219_194133012_zpsa46f3d15.jpg

I just duplicated this frame for a new bag for my son. He still needs a number of years before can stash some brews in it, but it is great and he loves it.

These instructions are spot on. Thanks for taking the time to detail the cut lengths and pieces needed.

Thanks for all the input in this thread as well!!

Great thread and great bag. We just need to plasti dip the bottom and we are good to go!!

Thanks again to all!
 
So I decided to try the based on the original posters designs. For the price of the bag and frame materials totaling only about $32 it's definitely not bad. I do have to make some frame adjustments because I added roughly a 1/3 inch to each length and it's tight going in the bag. Does a good job framing out the bag but is now a little stiff. So not much flex in the depth so the discs sit in there right from front to back and you can feel them when carrying. Also makes the "putter pocket" hard to use. May remove the sides of the frame and just let it go freely. Also still intend to add a pad to the bottom of the laptop sleeve and then see it closed and use that for accessible putters leaving the front pocket for everything else
 
ive got a brand new Embark Jartop elite - waterloo blue bag,
with a PVC frame inside, allowing for storage underneath, fits a six pack ;)
custom zipper pulls,

up for sale if someone wants to make an offer i can ship it out to you
thinkin maybe 40$?
15113374

i can upload pictures soon if anyone is interested
 
I just duplicated this frame for a new bag for my son. He still needs a number of years before can stash some brews in it, but it is great and he loves it.

These instructions are spot on. Thanks for taking the time to detail the cut lengths and pieces needed.

Thanks for all the input in this thread as well!!

Great thread and great bag. We just need to plasti dip the bottom and we are good to go!!

Thanks again to all!
No prob, glad to help. Definitely Plasti-Dip the bottom. I waited and started to see abrasion very quickly, but now that I've got 3 coats on there the bag is as good as new!

My next project will be improving the straps. With the price of gel-injected foam I might as well have bought a nicer bag, so I'm still shopping for a cheaper alternative.
 
Well I picked mine up tonight at Target for $27, had to price match the online price. I'm going to build the PVC skeleton for the inside this weekend. And a little patch I got online :)

HECpZ0E.jpg


TuC0H2v.jpg


zTHUm98.jpg
 
I was just checking to see if they were on sale yet this year and I noticed all of last year's colors are gone and the elite is slightly tweaked. I'm not sure what they mean by recycled content, I'm assuming it's polyester from recycled plastic but whatever.

The most obvious difference is the front pocket almost touches the zipper for the main compartment, older model had more than an inch of space. Might affect the putter access but oh well, I'm bummed about the lack of waterloo blue. Green and maroon are meh.
Anybody notice any other differences from last year's model?
 
The non recycled are all showing as out of stock...
Two bigger differences:
Got rid of the beaner loops, where am I hanging my towel and bag tag?
Replaced one of the side water bottle holders with a zipper pocket. Not a big deal if it still holds a 20oz gatorade when unzipped.
 
Instead of plasti-dip, has anyone used the gutter sealer on the bottom? I think this might work better, but I don't want to screw up my bag.
From what I've seen, brush-on Plasti Dip is more durable than the spray-on rubberized coatings (including Plasti Dip spray). Might be as simple as individual coats are thicker with the brush-on stuff, but it seems to hold up better regardless of the reason.
 
From what I've seen, brush-on Plasti Dip is more durable than the spray-on rubberized coatings (including Plasti Dip spray). Might be as simple as individual coats are thicker with the brush-on stuff, but it seems to hold up better regardless of the reason.

I thought that was what everyone was using....


I'm thinking of selling my bag now since a buddy just picked this up at academy this past weekend.

http://www.academy.com/shop/pdp/magellan-outdoors-deluxe-disc-golf-backpack

$30 and you're already setup. Wish I would have shopped around first. :-/
 
Top