• Discover new ways to elevate your game with the updated DGCourseReview app!
    It's entirely free and enhanced with features shaped by user feedback to ensure your best experience on the course. (App Store or Google Play)

*The Definitive DG Bag Modding Thread*

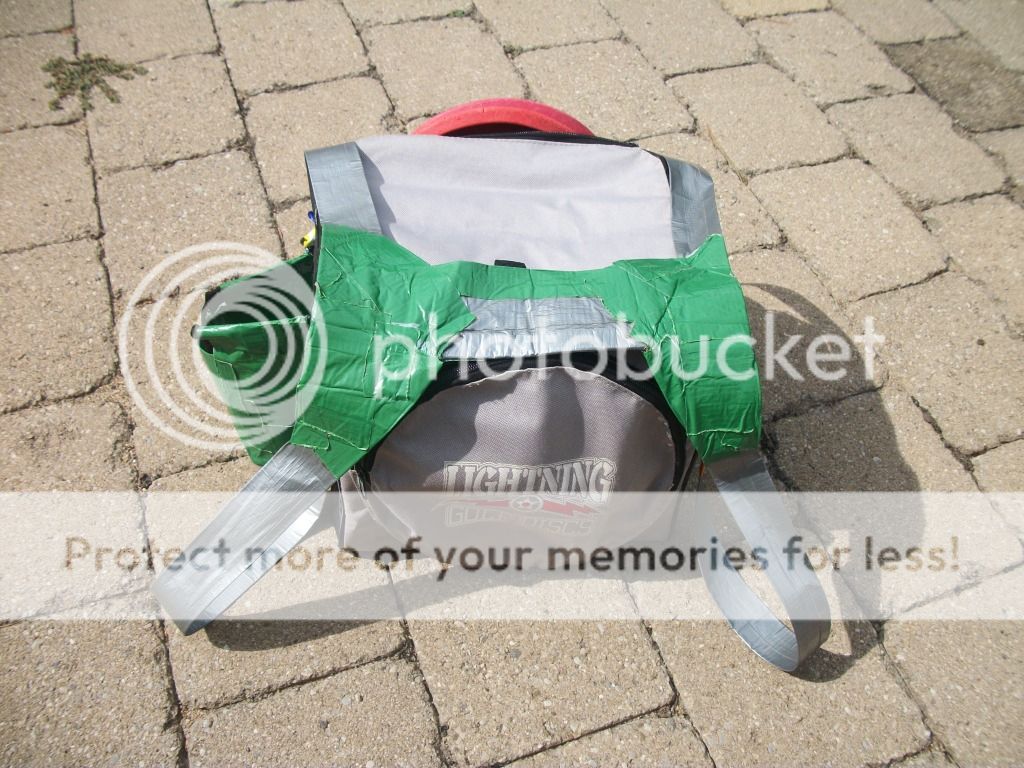
Alright Guys I did a mod to my Grip EQ Bag and wanted to share it with you guys. I thought of this idea myself and have been thinking of how to do it for some time now and have finally done it and its a little touch but it works really really well.

So if you have used ur Grip bag in the rain you know about the rainfly. The best way to use it is to snap off of the rainfly on and keep one of the bottom snaps undone so that you can get into your bag really really easy. This worked fine for me I just didn't like it when I was walking with the bag and the rainfly would be flapping in the wind. So to combat this I decided to try and mod the snap to work with a magnet so that it could be taken one and off really really easily. I'm really not good at sewing and I did my best to make it work.

Here is the rainfly part of the bag with the mod.

I completely took the snap off of the rainfly so that the magnet would sit on it better. If you are going to do this yourself make sure you buy a super magnet because the other ones are not strong enough, its what I tried the first time and it didn't work. For the fabric I used a fabric parch kit which has the fabric on one side and the patch stuff on the other side so that when I got done I ironed it and it melted all of the seems together.


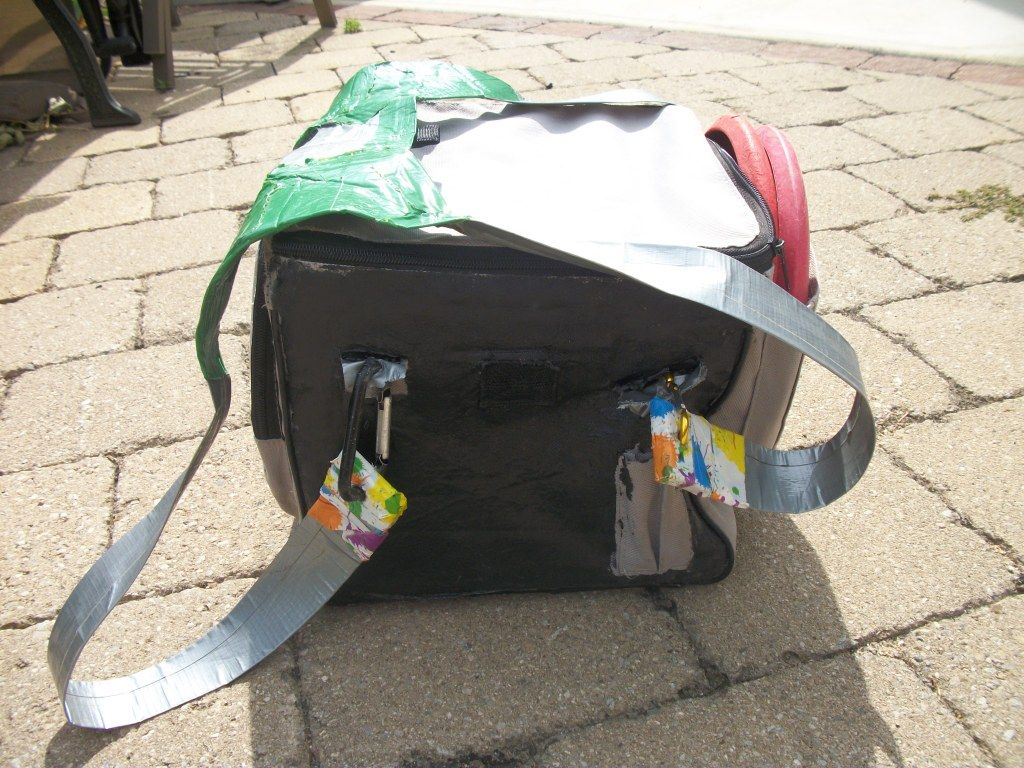
Here is the back of the bag that I modded to work with the magnet


What I did here was to take a piece of thick steel and sewed it into the backpack, I found that this actually worked better than another magnet. What I actually did was took a thick steel spoon and just used the head or spoon part of it and placed it over the snap and sewed it in. The roundness of the spoon lets the magnet attach at many angles and works really well. When I am wearing the bag I can't even tell that its there so it works out very well for me.


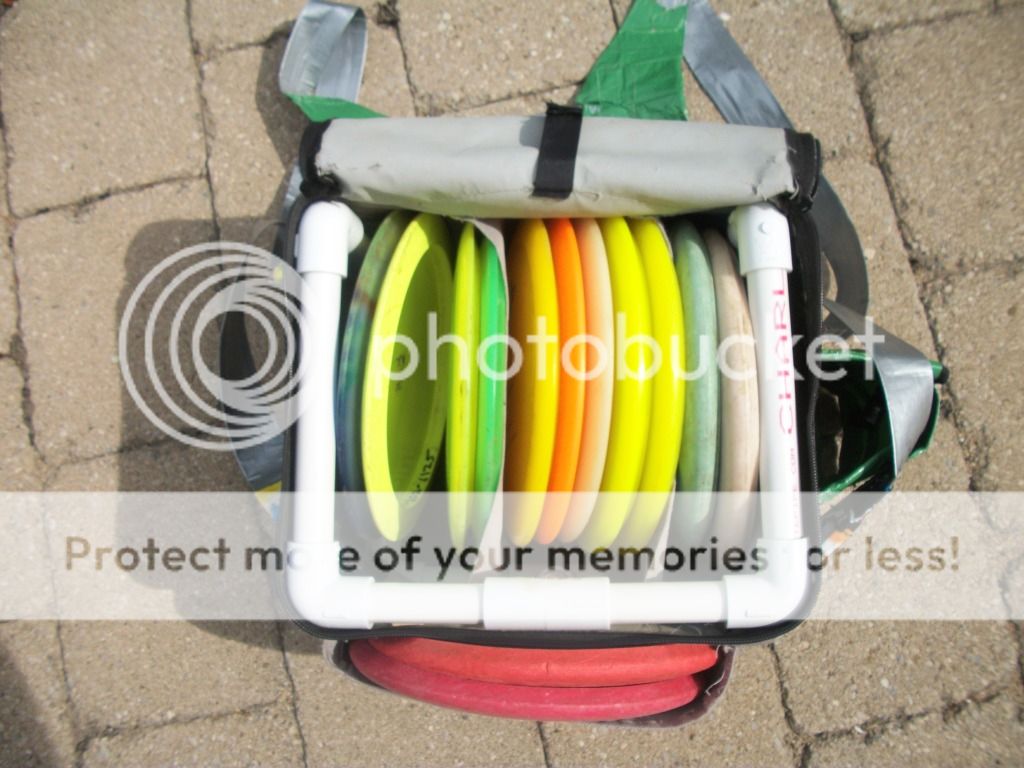
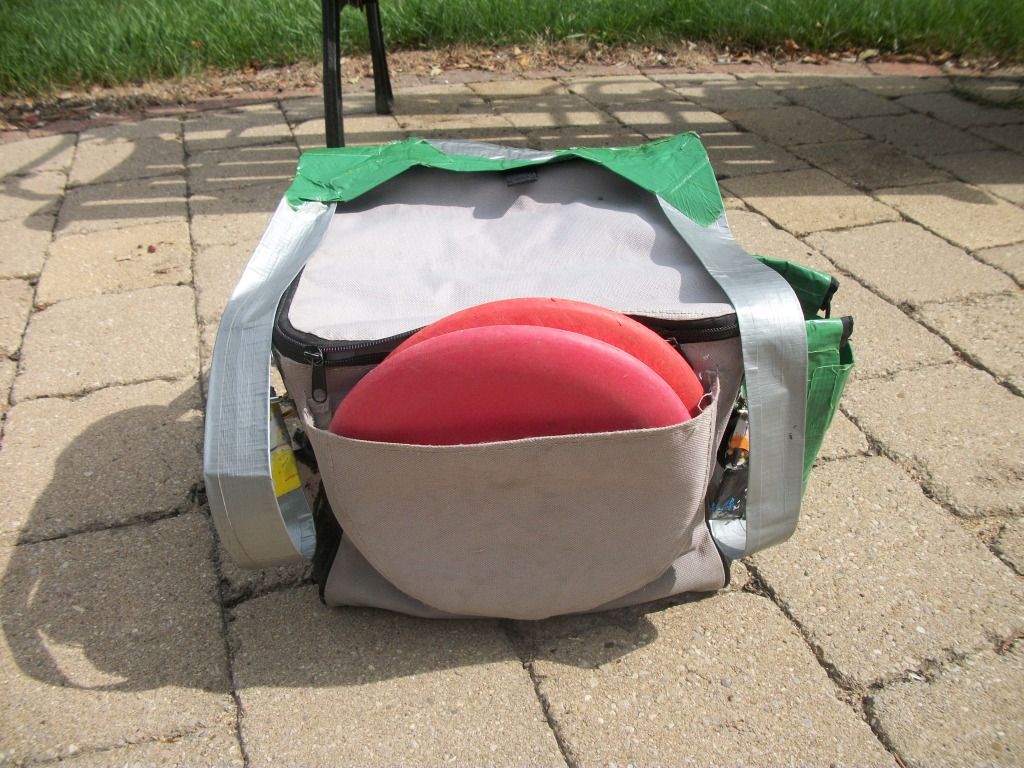
And here are a few more photos of the rainfly on the bag itself.

That is an awesome idea. I was thinking of attaching a carabiner to the rainfly to fasten it to the backpack strap, but I like your idea much better. I think I'll have to add that to my list of things to do this weekend. Also for anyone looking to do this, Neodynamium (spelling?) magnets at harbor freight are pretty dang strong and pretty cheap.
 
i obviously need to work on my taping skills (and picture sizes) but in the end i added life to my bags and i'm happy with the results

attachment.php
 

Attachments

  • photo.jpg
    photo.jpg
    100.4 KB · Views: 715
Love the bag threads. Mods include:
1) Skooba laptop bag strap
2) homemade birdie beads
3) cardboard inner frame made from watermelon shipping container. This has lasted somewhere around 7 years.
4) best for last, quick grab strap mod. Two small carabiners and strap (parts found at REI). I don't know what that strap is actually manufactured for, but it works perfect for this.:clap:

I know this comes a few years too late. But, that strap for item number 4 can be found in the climbing section at an REI store. They're used for many different things in climbing. Building anchor points, attaching carabiners to quick draws, ect. They're super strong (strong enough to hold someone's body weight times about 10) and would be more than suffecient for this application.
 
is that plastidip? Can you tell me what the process was?

1- Buy Plasti-Dip and foam brush.
2- Tape bag 1 inch above bottom.
3- Paint 3 layers allowing drying between application.

Note wrap brush in plastic wrap between layers to keep it moist or you will have a clumpy brush. The first coat soaks into the fabric and doesn't look too good. You will wonder what you got yourself into. The second layer is probably all you would ever need but the third layer makes it nice and smooth and gives it added protection.
 
is that plastidip? Can you tell me what the process was?

Here is a link to a thread all about plasti-dipping your bag. It has some various methods explained in detail on there as well. I used the directions on there to dip my FADE Tourney bag last spring and I have been playing like crazy and it still looks absolutely amazing.
 
I have a lat 64 pro bag. I like to keep extra bottles of water in the pocket on the back of the bag. But the bottles would bend my dividers in my bag. So I took my dividers out. Cut down one side. Removed the flimsy pieces of plastic with 1/4 inch thick 6x10 plastic camping cutting boards and sewed the dividers back up. Now my dividers don't distort when I'm loaded down. Very happy camper now.
 
Man that had to have stunk up your house? I did a few layers on my bag OUTSIDE on my porch, and the porch still smelled like Plasti-dip the next day :doh:

yeah, it was stinkier than i had planned.

that sunlight you see in the pic is dual patio doors wide open right next to the bags and three fans on the far side pushing the fumes outside.

safety first :)

advice to future plasti dippers: take your time taping. i had some bleeding and crooked lines.
 
1- Buy Plasti-Dip and foam brush.
2- Tape bag 1 inch above bottom.
3- Paint 3 layers allowing drying between application.

Note wrap brush in plastic wrap between layers to keep it moist or you will have a clumpy brush. The first coat soaks into the fabric and doesn't look too good. You will wonder what you got yourself into. The second layer is probably all you would ever need but the third layer makes it nice and smooth and gives it added protection.

:clap:thanks!
 
Here is a link to a thread all about plasti-dipping your bag. It has some various methods explained in detail on there as well. I used the directions on there to dip my FADE Tourney bag last spring and I have been playing like crazy and it still looks absolutely amazing.

:clap:very helpful. Thanks!
 
My dog just modified my Revolution Carolina. I think I have the only one with no putter holder!
 
I used a green tape that seals edges extra well. Frog Tape? Worked great.

Frog tape is the shizz! I do a little house painting on the side and the couple extra bucks you'll spend over the blue 3m tape is worth not having to go back and touch up little spots where the paint bled through.
 
Lightning large Lite bag. Plasti dipped on the bottom and two sides. Homemade PVC inside frame. Cut out slits in the sides to put duct tape backpack straps on. Duct tape modified drink holder. Ghetto al maximo, I know.
100_1065.jpg

100_1071.jpg

100_1067.jpg

100_1066.jpg

100_1068.jpg
 
I just picked up a set of toolrider GSX straps from amazon that were listed as used/like new for $15.91 shipped, if i hadn't known they were previously opened I would not have know the difference. They were still on the plastic packing sheet with zipties still attached. If anyone needs a cheap set of quality straps keep an eye on the amazon page for used/like new toolriders.
http://www.amazon.com/Brown-Bag-Com...UTF8&qid=1344564936&sr=8-1&keywords=toolrider
 
Lightning large Lite bag. Plasti dipped on the bottom and two sides. Homemade PVC inside frame. Cut out slits in the sides to put duct tape backpack straps on. Duct tape modified drink holder. Ghetto al maximo, I know.
100_1065.jpg

100_1071.jpg

100_1067.jpg

100_1066.jpg

100_1068.jpg

Can I pick one of these up at ghetto R us ?
 
So, I'm curious if anyone has tried using E-6000 to put patches on their bags. I will normally sew patches on, but there are spaces on my new Grip bag that you can't sew through. So, I'm stuck either finding a Plan B for sticking the patches on, or pay some embroidery shop crazy labor costs to get them on there.

E-6000 seems to be the best option for these materials, but I was wondering if anyone else had tried before. Awhile ago I had tried Liquid Stitch on my Crunch Box but it did not work very well.
 

Latest posts

Top