CrAcKaNuG
Newbie
So my brother-in-law and I have been dyeing disc's for awhile, he more so than myself. Between the two of us, he has become very good at all the traditional methods of dyeing and I have gotten good at experimenting with non-traditional methods. It also helps that he has a vinyl cutting plotter.
Full gallery: Image Gallery
I recently bought an airbrush to test out spraying dye hoping to master creating gradients quickly and easily. It was a success, here's a story:
-Air hose ran into the kitchen:
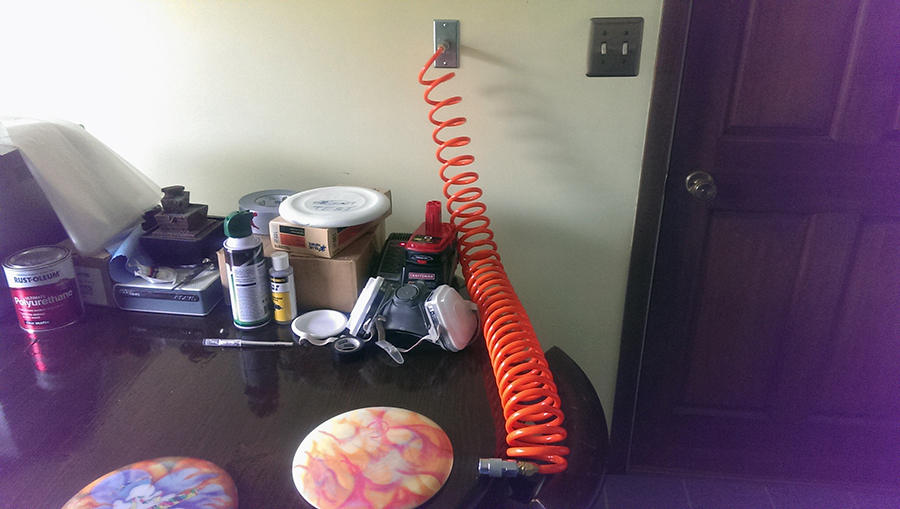
-I run just a little under 10psi, depends on the thickness of the mix. No more or it blows the mix around horribly, anything less causes a splotchy spray pattern.
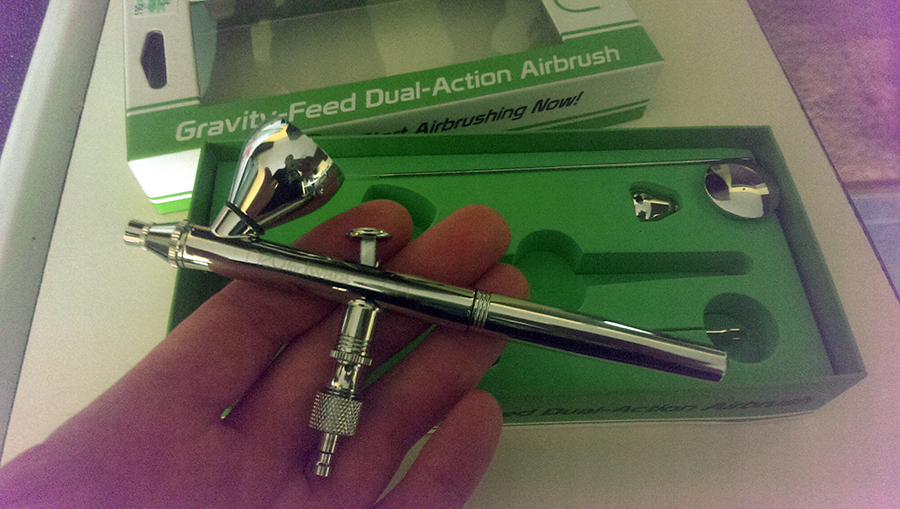
-Parts list:
1. Denatured alcohol, acetone, and clear unscented detergent (local hardware store $7 - $10 each)
2. Oregano shakers from Bed, Bath, and Beyond ($1 each, great for storing mixed dye)
3. Plastic squeeze bottles for final airbrush ready mix. ($1.79 from Hobby Lobby - 2 pack)
4. Measuring devices (Don't use your gf/wifes, or what you use for food - buy ones you don't care about)
5. ProChemical Dye, or your favorite. (price varies)
6. An airbrush (Iwata Neo CN $50-$70 - can be super expensive for fancier ones)
-After some trial and error (a lot of trial and error) I found a good dye mix:
1-tbls of denatured alcohol
1-tbls of acetone
1-tbls of scalding hot water. (from tap or heated on stove)
2 or 3 scooped and leveled 1/4 tsp of dye powder (depends on strength you want) I found 2 scoops work well for darker colors and 1 scoop for lighter colors, 3 scoops for black and red.
-Mix/shake these 4 ingredients together in the jars or something you can seal well. Once fully dissolved, or close to it, set the jars to the side.
-Get the plastic squeeze bottles or something equivalent and measure out 10 to 15ml (1 tbls) of clear unscented detergent and pour it into the squeeze bottles.
-Go back to the dye mix and measure out 5ml of the liquid (1 tsp) into the squeeze bottles of detergent. Add 10ml or 2 tsp of dye for black and red. Cap the bottles and give each a little shake to mix the color with detergent. Don't worry if it creates bubbles, they will go away.
Bam, your airbrush dye mix is ready and should be of a proper consistency.
NOTE: This method works extremely well with ProChemical dyes, I haven't test the other brands.
-After you are done spraying your dye, you don't need to keep anything wet or moist.
-Partly fill your sink or a some kind of container with water hot enough to create a little steam. Put some kind of shot glass or something in the water to keep the disk elevated and let it sit covered (I use tin foil) for 5 to 10 minutes. If you are careful or a risk taker you can float the disc in the water.
-Basically, just let the disc sit in some kind of a steam for 5 to 10 minutes.
-Once that time has passed rinse the disc with hot water. Dry with your favorite expendable towel. Done.
There will be trial and error...
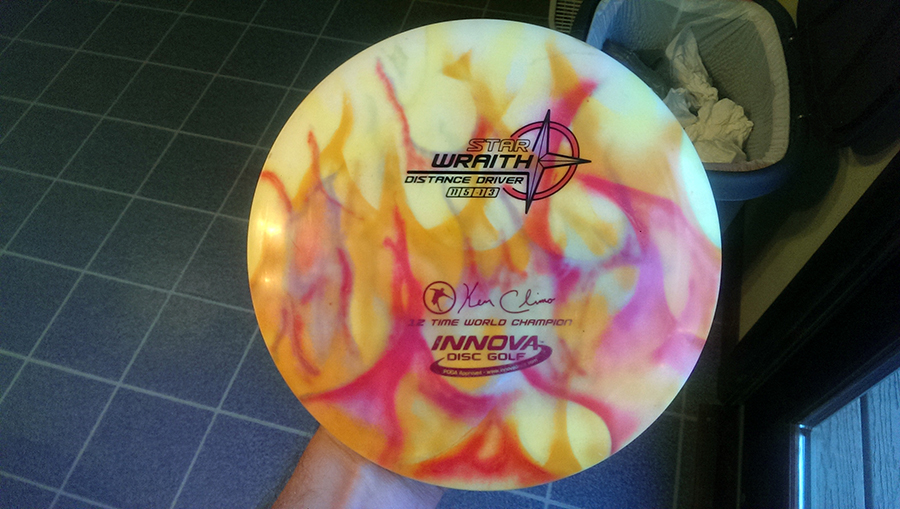
But after a little practice and patience you will get the hang of it:

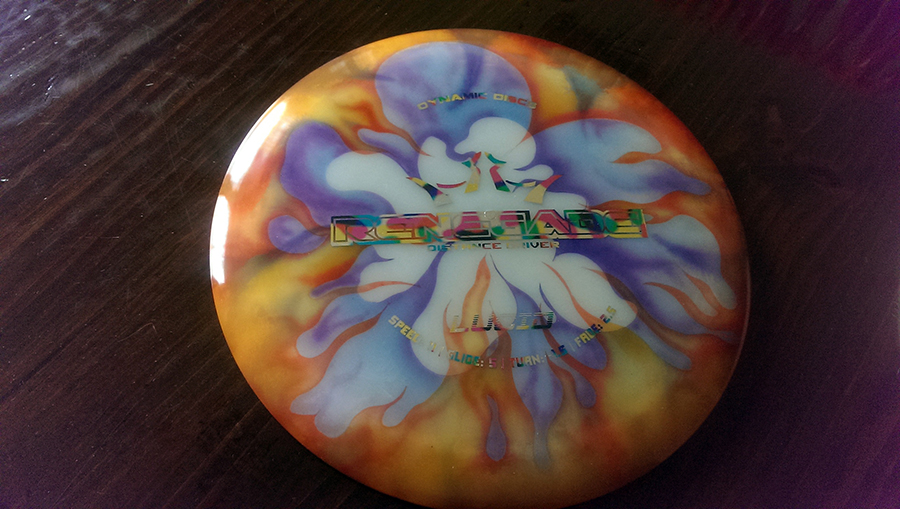
*Pro tip: Go slow and use stencils or vinyl to give crisp fine lines.
I hope this encourages anyone ready to take a plunge.
-Crack
Full gallery: Image Gallery
I recently bought an airbrush to test out spraying dye hoping to master creating gradients quickly and easily. It was a success, here's a story:
-Air hose ran into the kitchen:
-I run just a little under 10psi, depends on the thickness of the mix. No more or it blows the mix around horribly, anything less causes a splotchy spray pattern.
-Parts list:
1. Denatured alcohol, acetone, and clear unscented detergent (local hardware store $7 - $10 each)
2. Oregano shakers from Bed, Bath, and Beyond ($1 each, great for storing mixed dye)
3. Plastic squeeze bottles for final airbrush ready mix. ($1.79 from Hobby Lobby - 2 pack)
4. Measuring devices (Don't use your gf/wifes, or what you use for food - buy ones you don't care about)
5. ProChemical Dye, or your favorite. (price varies)
6. An airbrush (Iwata Neo CN $50-$70 - can be super expensive for fancier ones)
-After some trial and error (a lot of trial and error) I found a good dye mix:
1-tbls of denatured alcohol
1-tbls of acetone
1-tbls of scalding hot water. (from tap or heated on stove)
2 or 3 scooped and leveled 1/4 tsp of dye powder (depends on strength you want) I found 2 scoops work well for darker colors and 1 scoop for lighter colors, 3 scoops for black and red.
-Mix/shake these 4 ingredients together in the jars or something you can seal well. Once fully dissolved, or close to it, set the jars to the side.
-Get the plastic squeeze bottles or something equivalent and measure out 10 to 15ml (1 tbls) of clear unscented detergent and pour it into the squeeze bottles.
-Go back to the dye mix and measure out 5ml of the liquid (1 tsp) into the squeeze bottles of detergent. Add 10ml or 2 tsp of dye for black and red. Cap the bottles and give each a little shake to mix the color with detergent. Don't worry if it creates bubbles, they will go away.
Bam, your airbrush dye mix is ready and should be of a proper consistency.
NOTE: This method works extremely well with ProChemical dyes, I haven't test the other brands.
-After you are done spraying your dye, you don't need to keep anything wet or moist.
-Partly fill your sink or a some kind of container with water hot enough to create a little steam. Put some kind of shot glass or something in the water to keep the disk elevated and let it sit covered (I use tin foil) for 5 to 10 minutes. If you are careful or a risk taker you can float the disc in the water.
-Basically, just let the disc sit in some kind of a steam for 5 to 10 minutes.
-Once that time has passed rinse the disc with hot water. Dry with your favorite expendable towel. Done.
There will be trial and error...
But after a little practice and patience you will get the hang of it:
*Pro tip: Go slow and use stencils or vinyl to give crisp fine lines.
I hope this encourages anyone ready to take a plunge.
-Crack
